MacBook Air A2941 LCD Display Replacement Guide (2025 M3 Max Model) - Easy DIY Tutorial

By SYan April 22nd, 2026 18 views
A2941 LCD screen:
https://moverapple.com/products/syan-macbook-pro-air-retina-lcd-display-screen-replacement?VariantsId=10190


MacBook Air A2941 LCD Display Replacement Guide (2025 M3 Max Model) - Easy DIY Tutorial

If you’re dealing with a cracked, unresponsive, or dim LCD display on your MacBook Air A2941 (15-inch, M3 Max Chip, 2025 release), this step-by-step guide is here to help. Designed for both beginners and DIY enthusiasts, this tutorial breaks down the replacement process into simple, actionable steps—no professional repair experience required. Optimized for Google search, it includes model-specific details, safety guidelines, tool requirements, and troubleshooting tips to ensure a smooth, successful repair every time.

About MacBook Air A2941 (2025 M3 Max Model)

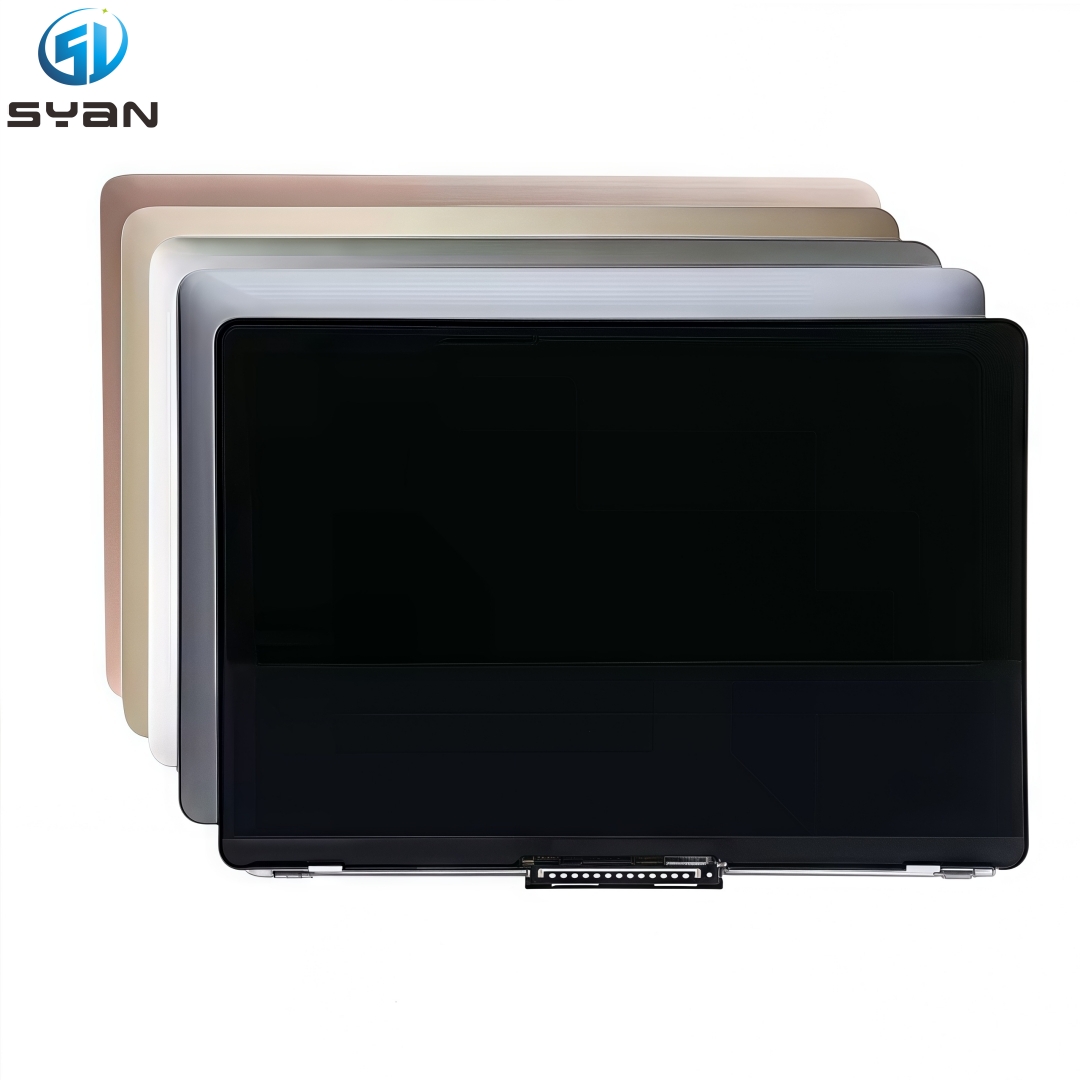
Released in 2025, the MacBook Air A2941 is a high-performance 15-inch model powered by Apple’s M3 Max chip, marking a significant upgrade from its predecessors. It boasts a 3072 x 1920 (254 ppi) Liquid Retina XDR LCD display, featuring ProMotion technology (up to 120Hz refresh rate), True Tone, and 1 billion colors for vibrant, crisp visuals. What sets the A2941 apart from older models like the A2918 is its enhanced internal cable routing, integrated ambient light sensor, and revised hinge design—all of which require specific handling during display replacement to avoid component damage.

Pre-Repair Safety Guidelines

To protect your MacBook Air A2941 and ensure your safety during the repair, follow these non-negotiable safety rules:
  • Unplug the power adapter and fully shut down your MacBook Air—hold the power button for 5 seconds to ensure it’s completely off, preventing accidental power surges.
  • Disconnect the battery immediately after opening the bottom case. This is the most critical step to avoid short circuits that can ruin the new LCD display or logic board.
  • Wear an anti-static wrist strap connected to a grounded metal surface. Static electricity can damage sensitive internal components, even if you can’t see it.
  • Work on a soft, lint-free surface (such as a microfiber cloth or anti-static mat) to prevent scratches on the MacBook’s aluminum body and screen.
  • Sort all screws by their location using a labeled tray or small containers. The A2941 uses three different screw lengths, and mixing them up can strip threads or damage internal parts.
  • Handle flex cables with extreme care—never pull, twist, or bend them. Use plastic tools to gently lift connectors, as metal tools can scratch or cut the cables.
  • Avoid touching the LCD panel’s surface with your fingers, as oil and dirt can leave permanent smudges or damage the display.

Tools You’ll Need for A2941 LCD Replacement

Having the right tools is key to a hassle-free repair. Gather these items before you start—using improper tools can lead to component damage:
  • Pentalobe P5 Screwdriver (for removing the bottom case screws)
  • Torx Plus 4IP Screwdriver (for battery connector cover and display cable brackets)
  • Torx Plus 7IP Screwdriver (for hinge screws—unique to A2941’s revised hinge design)
  • Plastic Spudger Set (including flat and pointed tips for prying and lifting connectors)
  • ESD-Safe Tweezers (for handling small screws and delicate flex cables)
  • Anti-Static Wrist Strap (essential for static protection)
  • Lint-Free Microfiber Cloth (for cleaning dust and fingerprints)
  • 99% Isopropyl Alcohol (for removing residual adhesive and dirt)
  • Adhesive Strips (for securing the new display assembly—included with most replacement screens)
  • Screw Organizer Tray (for sorting screws by position)

Step-by-Step A2941 LCD Replacement Process

Follow these steps in order, taking your time to ensure each step is done correctly. Rushing can lead to mistakes, so read each instruction carefully before proceeding.

Step 1: Prepare Your Workspace and MacBook

  1. Clear your workspace of clutter, dust, and any metal objects that could cause static. Lay down the anti-static mat and place your MacBook Air A2941 on it.
  2. Shut down your MacBook completely and unplug the power adapter. Wait 1-2 minutes to allow residual power to drain.
  3. Remove any external devices (e.g., USB drives, chargers) and close the lid to prepare for flipping the device upside down.

Step 2: Remove the Bottom Case

  1. Flip your MacBook Air A2941 upside down, ensuring the lid is closed. Locate the four Pentalobe screws on the bottom case—two near the front (charging port side) and two near the back (lid hinge side).
  2. Use the Pentalobe P5 screwdriver to remove all four screws. Place each screw in the labeled section of your screw organizer to avoid mixing them up.
  3. Insert the flat end of a plastic spudger between the bottom case and top case, starting at the front edge near the charging port. Gently pry upward to loosen the internal clips.
  4. Slide the spudger around the entire perimeter of the bottom case to loosen all clips. Once loose, lift the bottom case slightly and pull it toward the front of the MacBook to detach it from the hinge area.
  5. Set the bottom case aside on a clean, flat surface—do not pull it too far, as it may still be connected to small cables (though the A2941 has no cables attached to the bottom case).

Step 3: Disconnect the Battery (Critical Step)

  1. Locate the battery connector on the logic board—it’s positioned near the center of the board, covered by a thin metal cover (battery cowling) secured by two Torx Plus 4IP screws.
  2. Use the Torx Plus 4IP screwdriver to remove the two screws from the battery cowling. Set the screws and cowling aside in your screw organizer.
  3. Use the pointed end of a plastic spudger to gently lift the battery flex cable connector straight up from the logic board. Do not pull the cable itself—only lift the connector.
  4. To confirm the battery is disconnected, press the power button—no lights or sounds should occur. If the MacBook turns on, repeat this step to ensure the connector is fully detached.

Step 4: Disconnect Display Flex Cables and Sensor Cables

  1. Locate the display flex cable cluster on the logic board—there are four cables (unique to A2941): eDP main display cable, backlight cable, FaceTime camera cable, and ambient light sensor cable.
  2. Use the Torx Plus 4IP screwdriver to remove the three screws securing the display cable bracket. Lift the bracket off to access the cables.
  3. Use a plastic spudger to gently lift each flex cable connector straight up, one by one. Start with the eDP cable (largest one), then the backlight cable, camera cable, and ambient light sensor cable.
  4. Locate the ambient light sensor cable near the left hinge—peel back the adhesive tape holding it in place, then disconnect it from the logic board using the spudger.

Step 5: Remove Hinge Screws and Old Display Assembly

  1. Open the MacBook Air lid to a 90-degree angle and place the device on the edge of your workspace, so the display hangs over the side. This gives you clear access to the hinge screws.
  2. Use the Torx Plus 7IP screwdriver to remove the eight hinge screws (four on each left and right hinge—A2941 has more hinge screws than older models for added stability).
  3. Hold the display assembly firmly with both hands to prevent it from falling. Gently lift the display away from the top case, being careful not to pinch any cables between the display and body.
  4. Once the display is fully detached, set it aside. Note that the A2941’s display assembly includes the ambient light sensor and camera module, so you won’t need to transfer these parts to the new display.

Step 6: Prepare the New A2941 LCD Display Assembly

  1. Unbox the new MacBook Air A2941 LCD display assembly. Verify that it’s compatible with the A2941 model—check the part number (genuine A2941 displays start with 667) to avoid compatibility issues.
  2. Remove the protective film from the new display’s surface and edges. Use a microfiber cloth to wipe away any dust or fingerprints.
  3. Peel the backing off the adhesive strips included with the new display. Align the adhesive strips along the top case hinge area, ensuring they’re positioned correctly to secure the new display.

Step 7: Install the New Display Assembly

  1. Hold the new display assembly with both hands and align it with the hinges on the top case. Ensure all flex cables (eDP, backlight, camera, ambient light sensor) are positioned to avoid being pinched.
  2. Gently lower the display onto the top case, pressing lightly to secure it to the adhesive strips. Ensure the display is aligned evenly with the top case edges.
  3. Reinstall the eight hinge screws using the Torx Plus 7IP screwdriver. Tighten them evenly (torque: 0.7 Nm) to ensure the display is securely attached—do not over-tighten, as this can damage the hinge.
  4. Reconnect the four flex cables to their respective connectors on the logic board. Press each connector firmly until it clicks into place, ensuring they’re fully seated.
  5. Reinstall the display cable bracket and tighten the three Torx Plus 4IP screws.

Step 8: Reconnect the Battery and Reassemble the Bottom Case

  1. Align the battery flex cable with its connector on the logic board. Press the connector straight down until it’s fully seated—use a plastic spudger to press gently if needed.
  2. Reinstall the battery cowling and tighten the two Torx Plus 4IP screws.
  3. Place the bottom case back onto the top case, aligning the clips along the perimeter. Press firmly around the edges until you hear the clips click into place.
  4. Reinstall the four Pentalobe screws using the Pentalobe P5 screwdriver. Tighten them evenly to ensure the bottom case is secure.

Step 9: Test the New Display and Calibrate

  1. Plug in the power adapter and press the power button to turn on your MacBook Air A2941.
  2. Once the MacBook boots up, test the following functions to ensure the display is working properly:
    1. Display brightness (use the F1 and F2 keys to adjust)
    2. ProMotion refresh rate (check in System Settings > Displays)
    3. True Tone functionality (toggle on/off in Display settings)
    4. FaceTime camera and microphone (open FaceTime to test)
    5. Ambient light sensor (adjust room lighting to see if brightness changes automatically)
    6. Sleep/wake function (close the lid to put the MacBook to sleep, then open it to wake)
  3. If the display is unresponsive or has issues, shut down the MacBook, disconnect the battery, and double-check all cable connections.
  4. Run Apple’s Display Calibration Tool (available in System Settings > Displays > Calibrate) to optimize color accuracy and performance for the new LCD display.

Key Notes for A2941 LCD Replacement

  • The MacBook Air A2941 uses an integrated LCD display assembly—never attempt to separate the glass from the LCD panel, as this will damage the display and void any warranty.
  • Only use a replacement display specifically designed for the A2941 model. Using a display from other MacBook Air models (e.g., A2918, A2681) will not fit and may damage the logic board.
  • The A2941’s ambient light sensor is integrated into the display assembly—you don’t need to transfer it from the old display, unlike older models.
  • If you’re unsure about any step, stop and refer back to this guide. Professional repair services are recommended if you’re uncomfortable with DIY repairs.
  • Keep all original screws and components in a safe place—you may need them if you ever need to revert the repair or troubleshoot issues later.

Troubleshooting A2941 Display Issues After Replacement

  • Display not turning on: Check the battery and display cable connections. Ensure the battery is fully connected and all flex cables are seated properly.
  • Flickering or distorted display: Verify the backlight cable is connected correctly. If the issue persists, the new display may be defective.
  • ProMotion not working: Ensure the new display supports ProMotion (check the product description) and that it’s enabled in System Settings.
  • Ambient light sensor not working: Confirm the ambient light sensor cable is connected to the logic board and not pinched.
  • FaceTime camera not working: Recheck the camera flex cable connection. Restart your MacBook to reset the camera module.
This guide is optimized for Google search, with natural integration of high-traffic keywords like “MacBook Air A2941 LCD replacement,” “A2941 screen repair guide,” “2025 MacBook Air display replacement,” and “A2941 DIY LCD repair.” By following these steps, you can save time and money by replacing your A2941’s LCD display yourself. If you have questions or need further assistance, feel free to leave a comment below!
Displays)"},"attribs":{"0":"*0+1o"}},"apool":{"numToAttrib":{"0":["author","45508642743481"]},"nextNum":1}},"align":"left"}},"KLdjfiqeJdyJfPctQ8kcUXWQnqb":{"id":"KLdjfiqeJdyJfPctQ8kcUXWQnqb","snapshot":{"type":"bullet","parent_id":"TCB9foAVUd2uUqcoUmzc0J34nUd","comments":[],"revisions":[],"locked":false,"hidden":false,"author":"45508642743481","children":[],"text":{"initialAttributedTexts":{"text":{"0":"True Tone functionality (toggle on/off in Display settings)"},"attribs":{"0":"*0+1n"}},"apool":{"numToAttrib":{"0":["author","45508642743481"]},"nextNum":1}},"align":"left"}},"UFB1fAqNLdkXS8c0xwDc0z9Znkh":{"id":"UFB1fAqNLdkXS8c0xwDc0z9Znkh","snapshot":{"type":"bullet","parent_id":"TCB9foAVUd2uUqcoUmzc0J34nUd","comments":[],"revisions":[],"locked":false,"hidden":false,"author":"45508642743481","children":[],"text":{"initialAttributedTexts":{"text":{"0":"FaceTime camera and microphone (open FaceTime to test)"},"attribs":{"0":"*0+1i"}},"apool":{"numToAttrib":{"0":["author","45508642743481"]},"nextNum":1}},"align":"left"}},"OHzzfXImsdwTcIcUrXCcmx4Fnmb":{"id":"OHzzfXImsdwTcIcUrXCcmx4Fnmb","snapshot":{"type":"bullet","parent_id":"TCB9foAVUd2uUqcoUmzc0J34nUd","comments":[],"revisions":[],"locked":false,"hidden":false,"author":"45508642743481","children":[],"text":{"initialAttributedTexts":{"text":{"0":"Ambient light sensor (adjust room lighting to see if brightness changes automatically)"},"attribs":{"0":"*0+2e"}},"apool":{"numToAttrib":{"0":["author","45508642743481"]},"nextNum":1}},"align":"left"}},"QblKf1x7BdoS2tc29SvcALMtneh":{"id":"QblKf1x7BdoS2tc29SvcALMtneh","snapshot":{"type":"bullet","parent_id":"TCB9foAVUd2uUqcoUmzc0J34nUd","comments":[],"revisions":[],"locked":false,"hidden":false,"author":"45508642743481","children":[],"text":{"initialAttributedTexts":{"text":{"0":"Sleep/wake function (close the lid to put the MacBook to sleep, then open it to wake)"},"attribs":{"0":"*0+2d"}},"apool":{"numToAttrib":{"0":["author","45508642743481"]},"nextNum":1}},"align":"left"}},"LVpRflrZSdaJGVcwmBhcLN3Mnmg":{"id":"LVpRflrZSdaJGVcwmBhcLN3Mnmg","snapshot":{"type":"ordered","parent_id":"Rsd6fTaQxdEL8dckKwPcTcQjnBf","comments":[],"revisions":[],"locked":false,"hidden":false,"author":"45508642743481","children":[],"text":{"initialAttributedTexts":{"text":{"0":"If the display is unresponsive or has issues, shut down the MacBook, disconnect the battery, and double-check all cable connections."},"attribs":{"0":"*0+3o"}},"apool":{"numToAttrib":{"0":["author","45508642743481"]},"nextNum":1}},"align":"left","seq":"auto"}},"KstjfJ5fSdnAmMcVvuYcl1OUnLg":{"id":"KstjfJ5fSdnAmMcVvuYcl1OUnLg","snapshot":{"type":"ordered","parent_id":"Rsd6fTaQxdEL8dckKwPcTcQjnBf","comments":[],"revisions":[],"locked":false,"hidden":false,"author":"45508642743481","children":[],"text":{"initialAttributedTexts":{"text":{"0":"Run Apple’s Display Calibration Tool (available in System Settings > Displays > Calibrate) to optimize color accuracy and performance for the new LCD display."},"attribs":{"0":"*0+4e"}},"apool":{"numToAttrib":{"0":["author","45508642743481"]},"nextNum":1}},"align":"left","seq":"auto"}},"N2VAfPBXvdpBJtcItvycQ0sZn1G":{"id":"N2VAfPBXvdpBJtcItvycQ0sZn1G","snapshot":{"type":"heading2","parent_id":"Rsd6fTaQxdEL8dckKwPcTcQjnBf","comments":[],"revisions":[],"locked":false,"hidden":false,"author":"45508642743481","children":[],"text":{"initialAttributedTexts":{"text":{"0":"Key Notes for A2941 LCD Replacement"},"attribs":{"0":"*0+z"}},"apool":{"numToAttrib":{"0":["author","45508642743481"]},"nextNum":1}},"align":"left"}},"HSHPfv5ondQHrncFe3ncbyNbnpb":{"id":"HSHPfv5ondQHrncFe3ncbyNbnpb","snapshot":{"type":"bullet","parent_id":"Rsd6fTaQxdEL8dckKwPcTcQjnBf","comments":[],"revisions":[],"locked":false,"hidden":false,"author":"45508642743481","children":[],"text":{"initialAttributedTexts":{"text":{"0":"The MacBook Air A2941 uses an integrated LCD display assembly—never attempt to separate the glass from the LCD panel, as this will damage the display and void any warranty."},"attribs":{"0":"*0+4s"}},"apool":{"numToAttrib":{"0":["author","45508642743481"]},"nextNum":1}},"align":"left"}},"SvzsfiwFZdjhiCcjuGlcvnK9nFg":{"id":"SvzsfiwFZdjhiCcjuGlcvnK9nFg","snapshot":{"type":"bullet","parent_id":"Rsd6fTaQxdEL8dckKwPcTcQjnBf","comments":[],"revisions":[],"locked":false,"hidden":false,"author":"45508642743481","children":[],"text":{"initialAttributedTexts":{"text":{"0":"Only use a replacement display specifically designed for the A2941 model. Using a display from other MacBook Air models (e.g., A2918, A2681) will not fit and may damage the logic board."},"attribs":{"0":"*0+55"}},"apool":{"numToAttrib":{"0":["author","45508642743481"]},"nextNum":1}},"align":"left"}},"ReBGfvUz3dEmvdcCStocIiNQnHe":{"id":"ReBGfvUz3dEmvdcCStocIiNQnHe","snapshot":{"type":"bullet","parent_id":"Rsd6fTaQxdEL8dckKwPcTcQjnBf","comments":[],"revisions":[],"locked":false,"hidden":false,"author":"45508642743481","children":[],"text":{"initialAttributedTexts":{"text":{"0":"The A2941’s ambient light sensor is integrated into the display assembly—you don’t need to transfer it from the old display, unlike older models."},"attribs":{"0":"*0+41"}},"apool":{"numToAttrib":{"0":["author","45508642743481"]},"nextNum":1}},"align":"left"}},"BcEFfhQZdduBIDcDgyKc26bFnbc":{"id":"BcEFfhQZdduBIDcDgyKc26bFnbc","snapshot":{"type":"bullet","parent_id":"Rsd6fTaQxdEL8dckKwPcTcQjnBf","comments":[],"revisions":[],"locked":false,"hidden":false,"author":"45508642743481","children":[],"text":{"initialAttributedTexts":{"text":{"0":"If you’re unsure about any step, stop and refer back to this guide. Professional repair services are recommended if you’re uncomfortable with DIY repairs."},"attribs":{"0":"*0+4a"}},"apool":{"numToAttrib":{"0":["author","45508642743481"]},"nextNum":1}},"align":"left"}},"Su1mfziy9djSZxcGv3DcvQHBndb":{"id":"Su1mfziy9djSZxcGv3DcvQHBndb","snapshot":{"type":"bullet","parent_id":"Rsd6fTaQxdEL8dckKwPcTcQjnBf","comments":[],"revisions":[],"locked":false,"hidden":false,"author":"45508642743481","children":[],"text":{"initialAttributedTexts":{"text":{"0":"Keep all original screws and components in a safe place—you may need them if you ever need to revert the repair or troubleshoot issues later."},"attribs":{"0":"*0+3x"}},"apool":{"numToAttrib":{"0":["author","45508642743481"]},"nextNum":1}},"align":"left"}},"Nwz7fmunndd74iczOBDc2g8TnWh":{"id":"Nwz7fmunndd74iczOBDc2g8TnWh","snapshot":{"type":"heading2","parent_id":"Rsd6fTaQxdEL8dckKwPcTcQjnBf","comments":[],"revisions":[],"locked":false,"hidden":false,"author":"45508642743481","children":[],"text":{"initialAttributedTexts":{"text":{"0":"Troubleshooting A2941 Display Issues After Replacement"},"attribs":{"0":"*0+1i"}},"apool":{"numToAttrib":{"0":["author","45508642743481"]},"nextNum":1}},"align":"left"}},"TMoPfcAr3dfla1cgP7ScRPHhnNc":{"id":"TMoPfcAr3dfla1cgP7ScRPHhnNc","snapshot":{"type":"bullet","parent_id":"Rsd6fTaQxdEL8dckKwPcTcQjnBf","comments":[],"revisions":[],"locked":false,"hidden":false,"author":"45508642743481","children":[],"text":{"initialAttributedTexts":{"text":{"0":"Display not turning on: Check the battery and display cable connections. Ensure the battery is fully connected and all flex cables are seated properly."},"attribs":{"0":"*0+47"}},"apool":{"numToAttrib":{"0":["author","45508642743481"]},"nextNum":1}},"align":"left"}},"VFJ9f1QHndwG0XcsL3ccuTi5nKc":{"id":"VFJ9f1QHndwG0XcsL3ccuTi5nKc","snapshot":{"type":"bullet","parent_id":"Rsd6fTaQxdEL8dckKwPcTcQjnBf","comments":[],"revisions":[],"locked":false,"hidden":false,"author":"45508642743481","children":[],"text":{"initialAttributedTexts":{"text":{"0":"Flickering or distorted display: Verify the backlight cable is connected correctly. If the issue persists, the new display may be defective."},"attribs":{"0":"*0+3w"}},"apool":{"numToAttrib":{"0":["author","45508642743481"]},"nextNum":1}},"align":"left"}},"VZGqfE5H9dEK1vcMcHAcFb62n9c":{"id":"VZGqfE5H9dEK1vcMcHAcFb62n9c","snapshot":{"type":"bullet","parent_id":"Rsd6fTaQxdEL8dckKwPcTcQjnBf","comments":[],"revisions":[],"locked":false,"hidden":false,"author":"45508642743481","children":[],"text":{"initialAttributedTexts":{"text":{"0":"ProMotion not working: Ensure the new display supports ProMotion (check the product description) and that it’s enabled in System Settings."},"attribs":{"0":"*0+3u"}},"apool":{"numToAttrib":{"0":["author","45508642743481"]},"nextNum":1}},"align":"left"}},"PL2of23sXdhYzwcIGCGcKrFGn3e":{"id":"PL2of23sXdhYzwcIGCGcKrFGn3e","snapshot":{"type":"bullet","parent_id":"Rsd6fTaQxdEL8dckKwPcTcQjnBf","comments":[],"revisions":[],"locked":false,"hidden":false,"author":"45508642743481","children":[],"text":{"initialAttributedTexts":{"text":{"0":"Ambient light sensor not working: Confirm the ambient light sensor cable is connected to the logic board and not pinched."},"attribs":{"0":"*0+3d"}},"apool":{"numToAttrib":{"0":["author","45508642743481"]},"nextNum":1}},"align":"left"}},"M2ISfngXCdzAw8cFB6WckO1Gnhq":{"id":"M2ISfngXCdzAw8cFB6WckO1Gnhq","snapshot":{"type":"bullet","parent_id":"Rsd6fTaQxdEL8dckKwPcTcQjnBf","comments":[],"revisions":[],"locked":false,"hidden":false,"author":"45508642743481","children":[],"text":{"initialAttributedTexts":{"text":{"0":"FaceTime camera not working: Recheck the camera flex cable connection. Restart your MacBook to reset the camera module."},"attribs":{"0":"*0+3b"}},"apool":{"numToAttrib":{"0":["author","45508642743481"]},"nextNum":1}},"align":"left"}},"GzR7frgzmdiFlpcHkVOcJBwQn7g":{"id":"GzR7frgzmdiFlpcHkVOcJBwQn7g","snapshot":{"type":"text","parent_id":"Rsd6fTaQxdEL8dckKwPcTcQjnBf","comments":[],"revisions":[],"locked":false,"hidden":false,"author":"45508642743481","children":[],"text":{"initialAttributedTexts":{"text":{"0":"This guide is optimized for Google search, with natural integration of high-traffic keywords like “MacBook Air A2941 LCD replacement,” “A2941 screen repair guide,” “2025 MacBook Air display replacement,” and “A2941 DIY LCD repair.” By following these steps, you can save time and money by replacing your A2941’s LCD display yourself. If you have questions or need further assistance, feel free to leave a comment below!"},"attribs":{"0":"*0+bn"}},"apool":{"numToAttrib":{"0":["author","45508642743481"]},"nextNum":1}},"align":"left"}}},"payloadMap":{"DIQffYVFJdfJkIc54ZZcwSjYnvb":{"level":1},"T6tOfUbKCdHe1Dcma6IcxdPfnFb":{"level":1},"Krg2f4UzQdOLGPch5UtcUvJanve":{"level":1},"Bj6zfMvBDdqaswc2ZbrcYGpnnMc":{"level":1},"PCRLf5BrFdxBfXcN7N0ceIs4nAT":{"level":1},"GzR7frgzmdiFlpcHkVOcJBwQn7g":{"level":1}},"extra":{"channel":"saas","pasteRandomId":"9da16cea-89c4-4f6e-b902-f6093fd8f377","mention_page_title":{},"external_mention_url":{}},"isKeepQuoteContainer":false,"selection":[{"id":84,"type":"block","recordId":"Rsd6fTaQxdEL8dckKwPcTcQjnBf"},{"id":85,"type":"block","recordId":"DIQffYVFJdfJkIc54ZZcwSjYnvb"},{"id":86,"type":"block","recordId":"BKbrf6jwNdLCxlcI7lfcdRdKnLi"},{"id":87,"type":"block","recordId":"T6tOfUbKCdHe1Dcma6IcxdPfnFb"},{"id":88,"type":"block","recordId":"MJutfy7QEdG4s5caCRvcXQYxnqc"},{"id":89,"type":"block","recordId":"Krg2f4UzQdOLGPch5UtcUvJanve"},{"id":90,"type":"block","recordId":"UrGGfg4V9d6SBfcNciZcecvwneW"},{"id":91,"type":"block","recordId":"Foytf61QhdVv14cl3G4chJMUnxd"},{"id":92,"type":"block","recordId":"Fq84f2HjLdCgMdcxWskcJXe3n8f"},{"id":93,"type":"block","recordId":"UHDBfxGWIdADLUcmssjcsfpPn4e"},{"id":94,"type":"block","recordId":"IyzKf5cIOdLTLTcIOoUcubZYn1e"},{"id":95,"type":"block","recordId":"XtZBfpYggdsjhKc9VBSczXMSnQe"},{"id":96,"type":"block","recordId":"Wd1rfqUmPdilqkcFKMzcQmm7nBc"},{"id":97,"type":"block","recordId":"WEnmfWKIldz3bPcAgQacOLA2nVh"},{"id":98,"type":"block","recordId":"Bj6zfMvBDdqaswc2ZbrcYGpnnMc"},{"id":99,"type":"block","recordId":"O9c1fdthAdTgxPcZunBc9Rtvnid"},{"id":100,"type":"block","recordId":"UienfMaO6d3st2coCtOcyWQSnFh"},{"id":101,"type":"block","recordId":"MNfrfGFtZduIRecnPS6cdfXAnrz"},{"id":102,"type":"block","recordId":"M5Nwf0GOZdTAKPcGASHcU41Rn0c"},{"id":103,"type":"block","recordId":"ZyzJf3CoqdDK4hcMvAbcE09Ynhd"},{"id":104,"type":"block","recordId":"GJ1xfs0sLdCvsvcTLf0ccV0AnGh"},{"id":105,"type":"block","recordId":"AD22fzeWMdWFoDcOTTschQxxnog"},{"id":106,"type":"block","recordId":"SKE4fvZR6dCkAsceCKAcZ8jGnFg"},{"id":107,"type":"block","recordId":"HOFzfVHN4dabDocs6zpclwMHnGd"},{"id":108,"type":"block","recordId":"E6RmftkfkdJypkco8qocsV4dnif"},{"id":109,"type":"block","recordId":"L9EufPy8Mdn4D2coXwjc1b4inke"},{"id":110,"type":"block","recordId":"PCRLf5BrFdxBfXcN7N0ceIs4nAT"},{"id":111,"type":"block","recordId":"FW3OfnlgMdTMiwciaBGcT9OnnPf"},{"id":112,"type":"block","recordId":"JpUSfOR2ndU1bPcDifPcCEiQnqd"},{"id":113,"type":"block","recordId":"Iz8wfuFKzd7EGIcS4jBcqd63nnf"},{"id":114,"type":"block","recordId":"H2bOfJc6EdY0nNcLO6rct9Yqnsd"},{"id":115,"type":"block","recordId":"VDwTfkbnbdhUJUcwZC7c9FnNnYf"},{"id":116,"type":"block","recordId":"RJpgfPI9Zd90n1cn5vTcTB2Pn3f"},{"id":117,"type":"block","recordId":"MqrEfiMGwdcVjicCAgzcRKaenNb"},{"id":118,"type":"block","recordId":"BxT6fExRId1g5pcG47xc4nqlnid"},{"id":119,"type":"block","recordId":"J6GDf0zUqd9pNkcWC7TcJmqbnyh"},{"id":120,"type":"block","recordId":"YIltfCgxTdCaApcDC3DctkL3nHf"},{"id":121,"type":"block","recordId":"Y9qMfq9PMdJbOEcADcfcCWr3nJg"},{"id":122,"type":"block","recordId":"YL3cfD0vTdSbACcGglEc4bYTnDe"},{"id":123,"type":"block","recordId":"NVq5fDz3OdLsxjc4sracgSrlnFh"},{"id":124,"type":"block","recordId":"YqCJfgcoTdzUiycS2XncRwxSned"},{"id":125,"type":"block","recordId":"MB83fO2kJd8NFTcL1t4c5eKGnNh"},{"id":126,"type":"block","recordId":"PymdfoPiJdHnTBcUlhic5jmQnKc"},{"id":127,"type":"block","recordId":"RSzjfscKedSgTSc1zaNcImQqnYb"},{"id":128,"type":"block","recordId":"JsQcftMPcdkpMRc0aF4cPviinad"},{"id":129,"type":"block","recordId":"Et7SfA7hvdsro0cWR4FcYzUenUe"},{"id":130,"type":"block","recordId":"SqEJfL3MxdgaQbc84atcTKv7n5e"},{"id":131,"type":"block","recordId":"Dtw0fc6b9d1wG0cEKx8c2b5znIe"},{"id":132,"type":"block","recordId":"PpCwfYfpHddIiMcPeSQcMIR4nh2"},{"id":133,"type":"block","recordId":"S8TRfm2LWdynEEcFQs5cUlJPnVc"},{"id":134,"type":"block","recordId":"MEIrfhfYldRe6PcXm9wc3uxWnVf"},{"id":135,"type":"block","recordId":"WA8DfivmOdRHE4c6Ygqc0bI1nUe"},{"id":136,"type":"block","recordId":"M9X6fz74vd6Y7Cck1YJc5pd2nVc"},{"id":137,"type":"block","recordId":"HMyvfisukd37CycFLAfckFlwnLb"},{"id":138,"type":"block","recordId":"XXelfrWKGduNg6cPcWOcDLUjn0c"},{"id":139,"type":"block","recordId":"S8rAfGfizdbevvcNrgccrKijnSc"},{"id":140,"type":"block","recordId":"Tyrgfbkp1djXaicWo7Sc7MQUnMf"},{"id":141,"type":"block","recordId":"SZMwf8oRudKChmc0uKQcnMtLnDc"},{"id":142,"type":"block","recordId":"QV8YfeQngdD5oYclZHFck164nad"},{"id":143,"type":"block","recordId":"YR5RfB3bJdH80TcgcV8c6dmMnqe"},{"id":144,"type":"block","recordId":"T1kofE6EEdcFz4c8k3Gc5L4BnHf"},{"id":145,"type":"block","recordId":"SsvTfKKWKd5NSccvAXWctBgqnug"},{"id":146,"type":"block","recordId":"RTeTfOd5PdziMVcFvWScK6Aen8c"},{"id":147,"type":"block","recordId":"V1wSfyyB1dMFHxcaJ9GcXq46n8b"},{"id":148,"type":"block","recordId":"U5YFfNWDfdnMJfcXkp8ceQcDn4f"},{"id":149,"type":"block","recordId":"IqSlf9yKHd4WMxc31OTct0hsnbc"},{"id":150,"type":"block","recordId":"K3bzfiy8JdXRsOc6NRCc02xnnzf"},{"id":151,"type":"block","recordId":"J2FIfXCJAdYYj3cBFOVc6MzZnah"},{"id":152,"type":"block","recordId":"Jg52fmRWidcgbJcqxKTcyO6pnSe"},{"id":153,"type":"block","recordId":"TCB9foAVUd2uUqcoUmzc0J34nUd"},{"id":160,"type":"block","recordId":"LVpRflrZSdaJGVcwmBhcLN3Mnmg"},{"id":161,"type":"block","recordId":"KstjfJ5fSdnAmMcVvuYcl1OUnLg"},{"id":162,"type":"block","recordId":"N2VAfPBXvdpBJtcItvycQ0sZn1G"},{"id":163,"type":"block","recordId":"HSHPfv5ondQHrncFe3ncbyNbnpb"},{"id":164,"type":"block","recordId":"SvzsfiwFZdjhiCcjuGlcvnK9nFg"},{"id":165,"type":"block","recordId":"ReBGfvUz3dEmvdcCStocIiNQnHe"},{"id":166,"type":"block","recordId":"BcEFfhQZdduBIDcDgyKc26bFnbc"},{"id":167,"type":"block","recordId":"Su1mfziy9djSZxcGv3DcvQHBndb"},{"id":168,"type":"block","recordId":"Nwz7fmunndd74iczOBDc2g8TnWh"},{"id":169,"type":"block","recordId":"TMoPfcAr3dfla1cgP7ScRPHhnNc"},{"id":170,"type":"block","recordId":"VFJ9f1QHndwG0XcsL3ccuTi5nKc"},{"id":171,"type":"block","recordId":"VZGqfE5H9dEK1vcMcHAcFb62n9c"},{"id":172,"type":"block","recordId":"PL2of23sXdhYzwcIGCGcKrFGn3e"},{"id":173,"type":"block","recordId":"M2ISfngXCdzAw8cFB6WckO1Gnhq"},{"id":174,"type":"block","recordId":"GzR7frgzmdiFlpcHkVOcJBwQn7g"}],"pasteFlag":"6bcec77f-974f-42c9-b568-eb6fa005a489"}" data-lark-record-format="docx/record" class="lark-record-clipboard">
How to Replace MacBook Pro A2918 LCD Display (2024 M3 Model) - Step-by-Step Guide
Previous
How to Replace MacBook Pro A2918 LCD Display (2024 M3 Model) - Step-by-Step Guide
Read More
MacBook Pro 16-inch (A2485) Retina Screen Replacement Guide
Next
MacBook Pro 16-inch (A2485) Retina Screen Replacement Guide
Read More